Lesson Overview
Aboriginal Watershed
GRADES 6-8 SCIENCE AND ART
How can we document water behavior?
Lesson Process:
Step 1: View a variety of Aboriginal Paintings. Many of these paintings document the path of water in dry Australia.
Then, view your own local watershed and look at the map of real-time streamflow in your area. What do you notice? What patterns emerge?
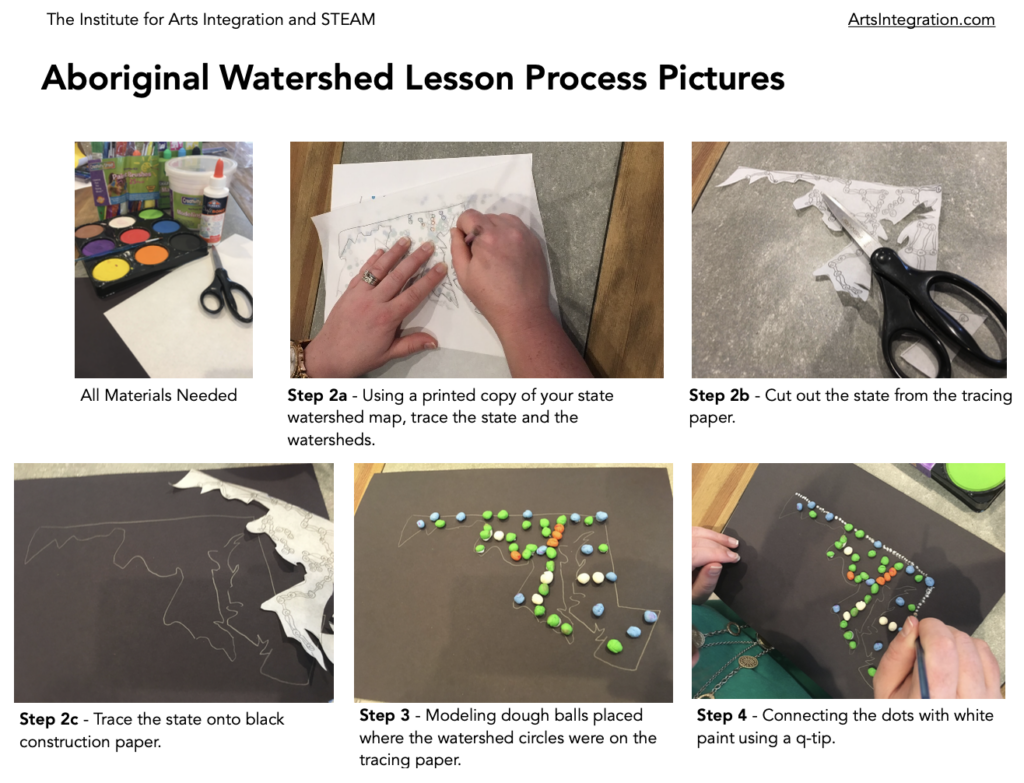
Step 2: Print off the map of your state and have students trace it on their tracing paper. Trace the circles and label each with the colors on the page. Place the tracing paper on a piece of black construction paper. Outline the state on the black paper.
Step 3: Using colored modeling dough, roll small balls to represent each retrieval area. Glue each of these onto the black paper on the state as represented on the tracing paper.
Step 4: Use white paint and a q-tip or small paintbrush to add white dots as an outline for the state. Continue to fill in the areas of the state between each water data point with painted dots.

Time Required:
30-45 minutes
Materials List:
- Riverside Construction Paper – Black
- Pencils
- Modeling Dough – multi colored
- Tempera paint
- Paintbrushes
- Tracing Paper
- Scissors
- Tacky Glue
Assessment:
Class Discussion and Exit Ticket.
Ask questions about the project on an exit ticket. Then discuss as a class on ah-ha’s and questions.
- What does the watershed map tell us?
- How does our own map tell this story?
- How is Aboriginal art both useful and creative?
- What do you predict will happen in our watershed over the next few months?


