Using Technology to Support Arts Integration and STEAM
7 Min Read • Technology
Summer is the perfect time to experiment with new tech tools that could help support and enhance instruction in the STEAM classroom. Each year I revise and edit my list of favorite tech tools based on what I find effective in the elementary classroom. Below, you’ll find my current top 3 ways to integrate technology with Arts Integration in mind.
If you haven’t already, make sure to register for EducationCloset’s Connectivity Summer Online Arts Integration and STEAM Conference, happening July 20, 2017. My session will describe these tools in detail and show them in use. Sometimes you have to see things in action to implement them with ease. In addition to my session, you will find many other fantastic educators, artists, and speakers that will provide ideas and inspiration for you!
Augmented and Virtual Reality
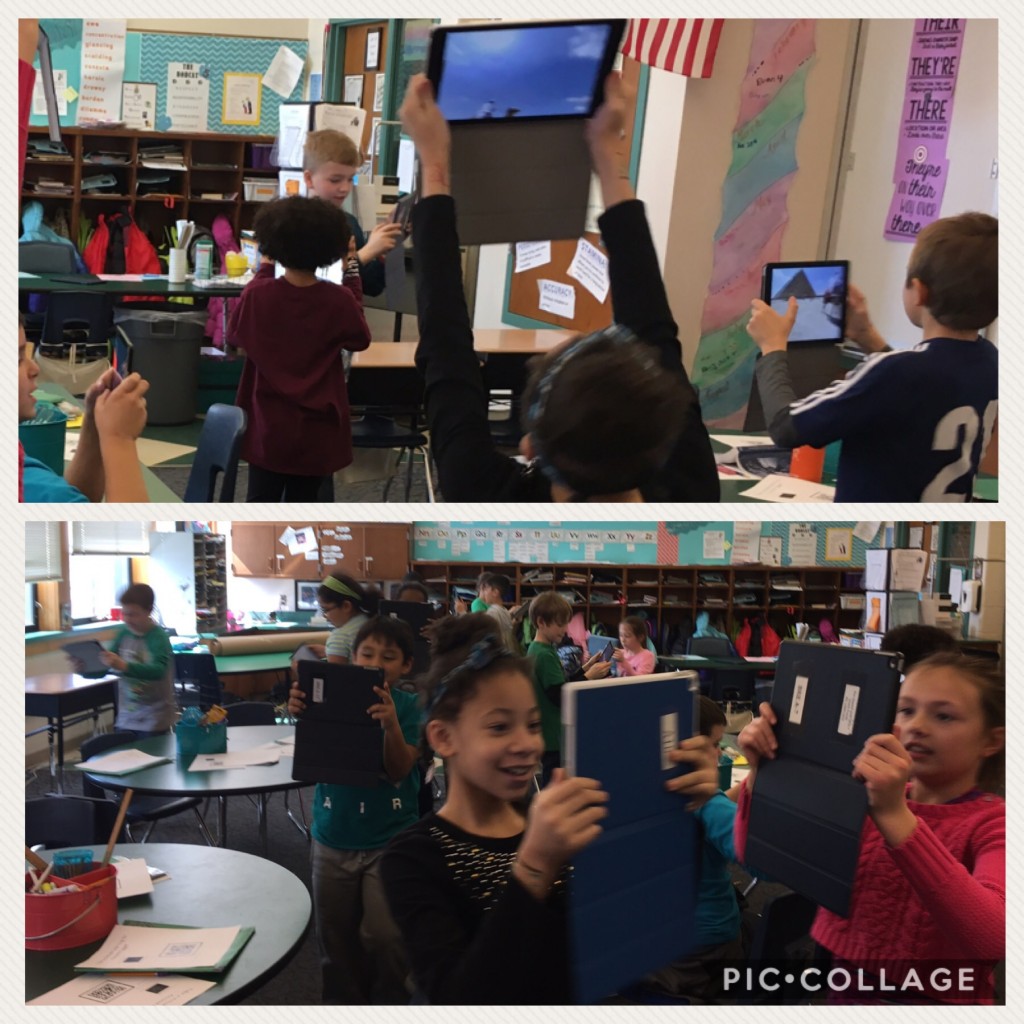
Augmented Reality and Virtual Reality were common themes at both a local technology conference I attended and at NAEA this year. If you aren’t familiar with the terms, here’s a crash course: Augmented Reality is defined as, “a technology that superimposes a computer-generated image on a user’s view of the real world, thus providing a composite view.”
In other words, you can scan an image and something new will happen on your screen. Virtual Reality is viewing a 360-degree image. This can be done on a mobile device with a viewer like Google Cardboard, or on the device alone. Even if there is only one computer in the classroom, the image can be projected for the class to interact with as a whole.
Augmented reality is magical fun, and it has the potential to tremendously enhance instruction. With the use of apps like Aurasma and Layar, it allows any 2D print you choose to work like a QR code. Or, as Drew Milnock from Two Guys and an iPad says, a QR code on steroids! If you’re looking for instant engagement, this will do it.
Teachers can layer an instructional video on a math worksheet, or layer a video of string instruments playing on top of a poster about the strings family. Students can make their own augmented realities by creating art and layering a video of their process, a selfie of them while working, or further information on the topic they’ve depicted on top of their work. After creating this augmented image, anyone with the app it was created with can scan it and see the hidden video, picture or website.
Virtual reality is a step into another world when it is too far to visit on a field trip. Simply find any 360 image and project it or share the link with students. Nearpod has many teacher-ready virtual reality experiences/lessons that can be controlled by the teacher while students follow and explore on their own devices. My class exploded with engagement as we visited the pyramids in Egypt and explored hieroglyphics within the Tomb of Ramesses.
We’ve also “walked” on the Great Wall of China. Google 360 also has many searchable images that are designed for use in this way. Older students can even create their own 360 experiences with the Google Cardboard app.
Find educational 360 images here:
SeeSaw
Seesaw continues to stay in my top 5 most useful apps, simply for its comprehensiveness and ease of use. This app is an interactive online portfolio for students that privately connects parents. Students can annotate pictures, post videos, caption posts with audio, and easily post to their account from many, many other apps. Teachers are able to approve or deny all student posts as well as student and parent comments that are posted.
Parents who are connected see and comment only their child’s work unless there are multiple students tagged to a post, which might occur in a group project. Since it is so simple to log in with a scannable QR code, this eliminates the need for students to type a password (although you can use passwords if you’d like). Teachers can post links, assignments, and other digital media for students to use, which makes it easy to flip lessons. One huge perk of using Seesaw is that students can focus more on learning content rather than getting used to the technical aspects of many different apps, as for me Seesaw has replaced Skitch, Edmodo and Instagram, as well as a few steps when sharing pictures and videos.
Seesaw is also very easy to share with specialists. Teachers can share an account, and folders can be created for each subject or class. When students attend music class, they scan the same QR code and drop their work in their music folder. This connects to the same parents and adds to the same account as in the regular classroom, saving the specialist from setting up an account for every student in the school.
In a music class or for reading fluency check-ins, teachers can post a picture of sheet music or a page of selected text. Each student in the class can copy and edit the original post with an audio caption to record their reading of the text or their singing/playing of the music. Teachers can listen back later to assess and comment on the student work. With enough devices, this could lessen the amount of class time teachers need to meet with all students individually. (Although it should not completely replace these individual conferences, as they can provide much more than simply a reading score.)
My art teacher shared a great idea for using Seesaw to allow students to generate ideas without modifying their original work. She suggested that students take a picture of an unfinished drawing and use Seesaw’s drawing/annotation tool to continue it to see if they like a new idea. Teachers can also use this same function to demonstrate a suggestion on student work without marking a student’s paper.
There are many quick and helpful PD video clips for nearly any grade level and content area. Seesaw also provides plans for easily rolling out Seesaw in the primary and intermediate classroom. A must-do for next school year!
Green Screens
Green Screen technology projects provide students with everything they need to foster 21st-century skills, specifically the 4C’s of creativity, collaboration, critical thinking, and communication. By recording students (or anything else) in front of a green background, students are later able to change the green to any background they choose. In addition, it is simple enough for elementary age students to master, allowing them to focus on telling their story instead of worrying about the technology. This technique works wonderfully for reader’s theater, student-written plays, newscasting, biographies with a realistic setting, and stop-motion animation.
I have found that the app Green Screen by Doink is the most user-friendly tool for a project such as this. To record students, cover the wall and floor of a space with green butcher paper (or green tablecloths from the Dollar Store). If you are recording something smaller, such as Legos or clay models, paint a cardboard presentation board green to use instead. If students will be acting in the video, have them remove their shoes so they don’t rip the paper as they move, and remind them not to wear anything green at all. It is also very helpful to use a tripod to steady the recording device.
After recording, students use the Green Screen app to layer their video on top of a chosen background. Since they can choose an image from the camera roll, there is a great deal of flexibility. Students can draw or paint a scene as their setting, take a picture, or find an online image that would work for their background. The app contains simple editing tools so that students can change backgrounds, crop video clips, and move and change the size of the characters they recorded. Once the video is published, it is easy to share it on a variety of platforms.
My favorite Green Screen project is shown below. It centers around the story The Legend of Sleepy Hollow. Find resources and a description of the project here.
A colleague of mine used Green Screen as a tool for book review presentations. Students chose an illustration from a book they read and layered it under a book review recording. Here’s an example:
While we know technology can’t replace effective teachers, it can greatly enhance instruction when used appropriately. These resources are just a few tools that can help propel students into 21st-Century learning in ways that traditional instruction cannot. If you’d like to try these, but need to see more, make sure to join us at the Connectivity Online Arts Integration & STEAM conference for handouts and step-by-step tutorials. And if you’re already using this type of technology and have some more tips, join us in the conference chat so that we can learn from you!


