Creating a Classroom at Home
5 Min Read • Flipped Classroom
As the future of 2020 remains uncertain, one thing is for sure: educators will need to be flexible. As teachers and leaders receive news that at least part of our year will be spent in remote learning, many are looking for ways to make teaching online a better experience than it was in the spring. For some, that means organizing their LMS, searching for lessons and processes that can be done in online learning spaces, and diving into what schedules will look like in the fall.
It can all feel a bit…out of control.
But there is ONE thing that we do have control over: our online learning spaces. When everything else is spinning and fluctuating, getting into the back-to-school routine of preparing your “classroom” is something we can all do. From what I’ve been seeing in a variety of online teacher groups, Bitmoji Classrooms are a very popular option. But I’d like you to consider an alternative: creating a physical classroom at home.
The Limits of Simulated Classrooms
While simulated classrooms give you a wide variety of options and can be fun to create, looking at them as a learner in an online setting can be overwhelming and overstimulating to some learners. If you decide to go this virtual route, I urge you to make sure you create a different scene for each area you’d like students to visit. This way, it limits how much “stuff” they see all at once. Very much like actual classrooms, a virtual classroom needs to have plenty of whitespace to allow for students to scan and focus.
Also, while creating a Bitmoji of yourself has a “coolness” factor, it doesn’t foster the same kind of connection as seeing you on camera. With remote learning already being distanced by its very nature, we want to build relationships as much as possible for our students as part of the Social-Emotional Learning that is so desperately needed. This is where your dedicated classroom from home comes in!
How to Create a Classroom at Home
Creating a physical classroom in your home has a few advantages. It allows you to have a separate space where you can set up your instruction for the day ahead, so you won’t feel rushed or like you’re playing catch up. It also helps you separate your work life from your home life. Once you leave that classroom space, you can then focus on your own home life.
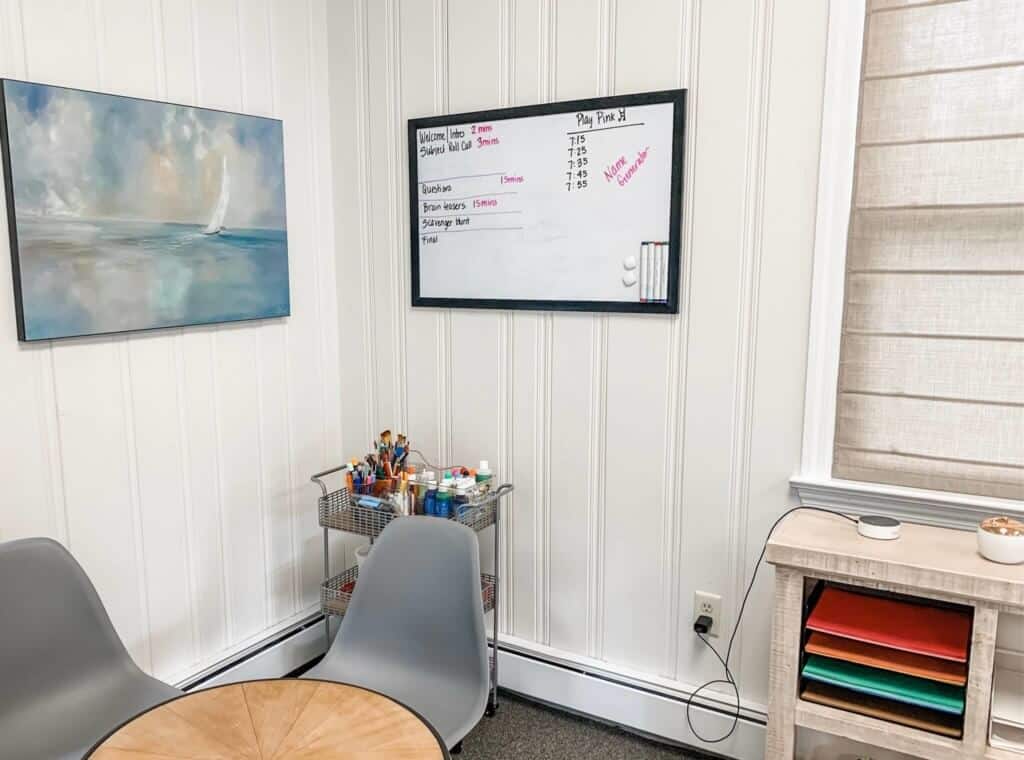
You don’t need a large space to do this – even a small corner will work. We’ve done this in our own office:
We took a corner of one room and placed a small table, some chairs, a whiteboard, some supplies and a small cubby to create a dedicated classroom space. Now, whenever we need to record some demonstrations or video lessons, all we need to do is set up the video equipment.
Space Considerations
If you’re interested in creating a classroom at home, there are some equipment and space considerations you’ll want to keep in mind.
First, don’t try to cram in too much in your space. Remember: you’ll want to be organized and also keep the students focused when they’re watching you on screen. The supplies we have listed below are plenty.
Also, try to create your space in a place that has natural light in your home. If you can have a window either in front of your desk (not behind – that will cast a shadow) or on the side, that’s the best. Sometimes, it can get really dark on the screen and it’s hard to see you.
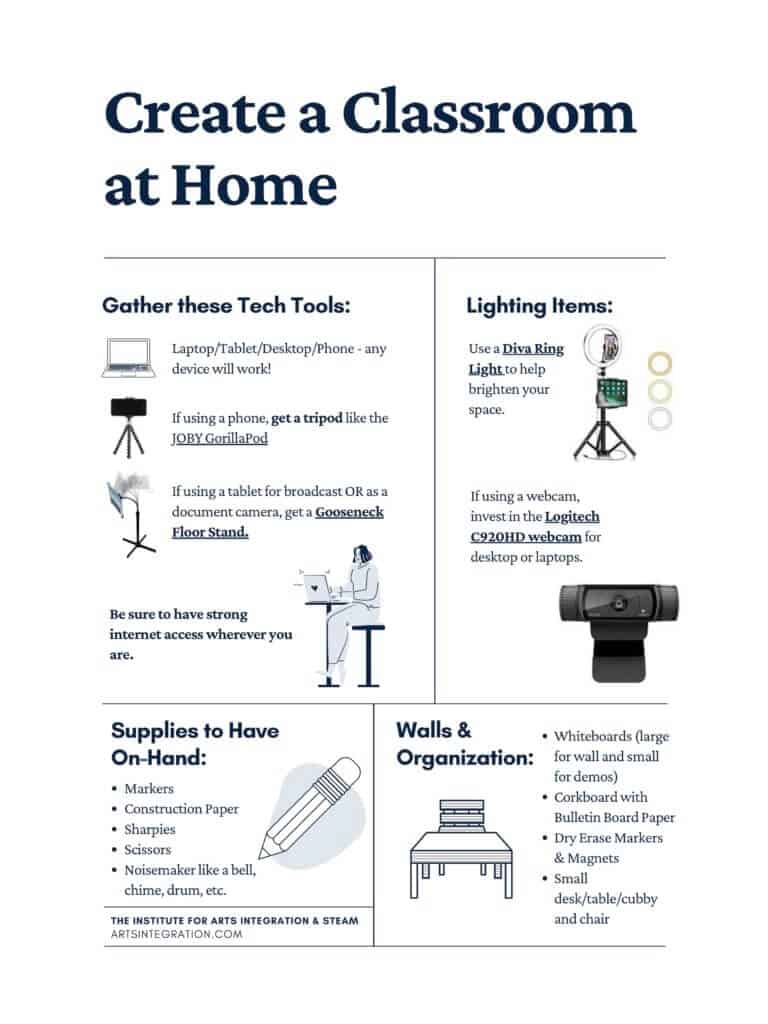
If natural light in your space isn’t available, definitely use a Diva Ring Light when you go live or are recording. We’ve done this a lot in our own recording spaces. This special ring light really helps to brighten the video and makes paying attention a whole lot easier for the viewer.
On your walls, consider getting a simple Whiteboard at your local Wal-Mart or Target, along with some corkboard tiles that you can cover with simple bulletin board paper. You can then add digital class rules, organizational folders, class jobs, etc to them and have them in the background for easy reference.
Quick tip: if you’d like to record a demo on your whiteboard, lift the camera slightly above the board and tilt it down at a 45-degree angle. This will eliminate glare and allow students to view you at the board in real-time.
Creating Demo Videos from Above
Demonstrating on camera in real-time can be extremely helpful for students. There’s several ways to do this, but the easiest is through using a tablet or phone as a document camera.
To do that, you’ll need a separate tablet/phone from your computer, as well as a Gooseneck Floor Stand. The Gooseneck Floor Stand will hold your second device securely above the table and allow your second device to act as a document camera. This way, you can show students in your online classrooms how to do things with hands-on learning.
Here’s a few tutorials on how to set up this process:
List of Tools to Get Started
Here’s a list of all the tools we use when recording video (for both synchronous and asynchronous learning):
- Selfie Ring Light
- Logitech C920 HD Webcam (this is a great alternative if you don’t have a ring light or natural lighting)
- Joby GripTight Flexible Tripod
- Tablet Gooseneck Floor Stand
As you begin your own journey into remote teaching, remember: it’s not about doing all the things. It’s about doing a few things well. So don’t feel pressured to create 20 different Bitmoji classrooms, color-code your Google Drive folders, or create a big fancy classroom space. Select one or two things and start there. We’re all this together!


