A Foolproof Formula for Documenting Arts Integration
4 Min Read • Arts Integration
One large component of applying for arts integration grants is documenting Arts Integration and STEAM lessons that were previously taught. That’s because of one big truth of human nature: people like to see what’s going on. In general, we all would rather watch a video, right? Or listen to a presentation or physically experience something over just reading about it. We need to provide this interactive connection with arts integration to those who can support it long term.
Oftentimes, these grant applications for arts funding are due in the fall, when teachers haven’t yet had much time to teach using Arts Integration and STEAM methods. So whomever is applying for the grant should have a standardized method of recording arts integration lessons. We highly suggest keeping them in a file to pull from when it comes time to write grant applications. Even if applying for funding isn’t necessary, maintaining an organized system of Arts Integration and STEAM lessons is beneficial. Teachers can reference them for inspiration, vertical alignment, as well as bringing new team members on-board, too.
Sway Documentation
Here is one method for standardizing your documentation of Arts Integration and STEAM lessons: Sways! Have you used the Microsoft Sway program with Office 365 before? It allows teachers to document lessons in a multi-media canvas and upload to a communal folder. Create an electronic folder and have teachers submit visual and written documentation of AI/STEAM lessons adhering to a standardized template. When it comes time to provide documentation of these lessons, there will be an organized location with all previous lessons.
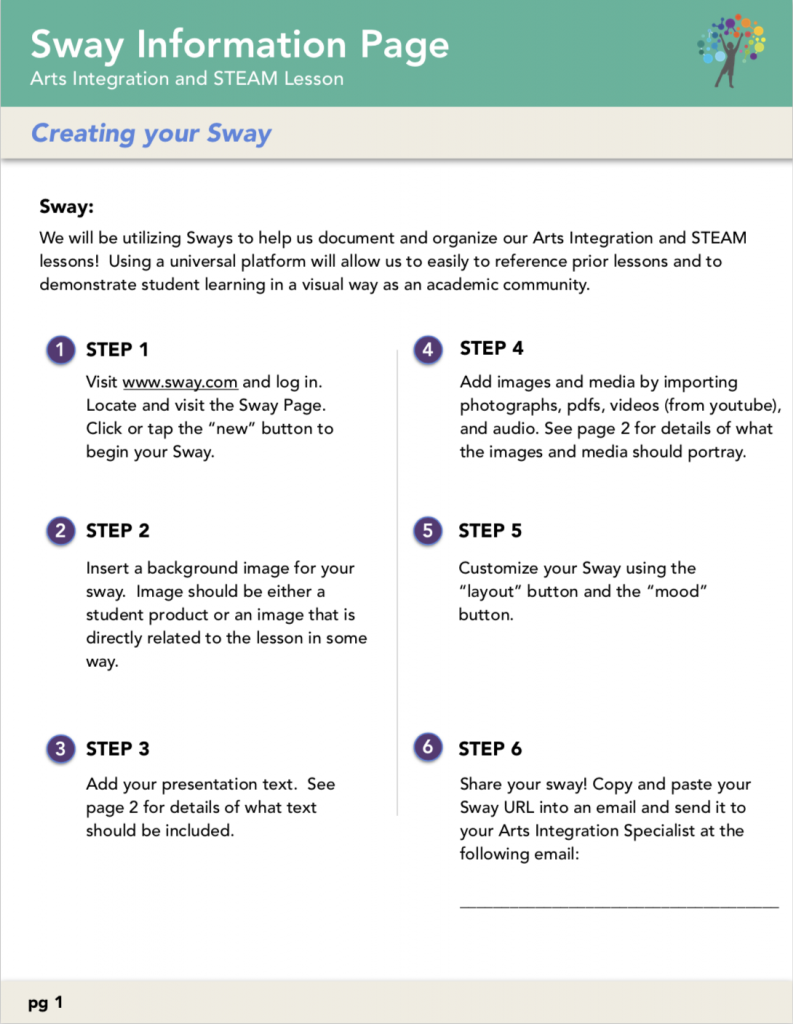
Have your teachers use the downloadable form below. This will help guide them through the process of creating a Sway and detailing what information to include. Make sure that teachers record both the content and art standards used in the creation of the lesson. Be sure to include photographs of student work, or videos pulled from youtube of student practice or performance.

Step 1: Visit www.sway.com and log in. Locate and visit the Sway Page. Click or tap the “new” button to begin your Sway.
Step 2: Insert a background image for your sway. Image should be either a student product or an image that is directly related to the lesson in some way.
Step 3: Add your presentation text. See page 2 for details of what text should be included.
Step 4: Add images and media by importing photographs, pdfs, videos (from youtube), and audio. See page 2 for details of what the images and media should portray.
Step 5: Customize your Sway using the “layout” button and the “mood” button.
Step 6: Share your sway! Copy and paste your Sway URL into an email and send it to your Arts Integration Specialist.
If teachers are concerned about remembering to document student work, consider also implementing a buddy system. Each teacher might consequently agree to use a small portion of a free period to photograph or video record the art product of performance of an AI or STEAM lesson taught by a teacher peer in exchange for the same favor in return.
If the same lesson is taught to multiple classes, consider compiling all student documentation into one Sway presentation. (Rather than having multiple presentations detailing the same lesson.) Sort lessons in the electronic folder by year, marking period, subject area, and grade level to help maintain clarity and organization for grant writing purposes
Bonus Idea
Consider compiling Sways into a Youtube video and play the compiled videos on a projector before Arts Integration Showcases or Student Work Exhibitions.
Included Content
Be sure to include the following text components in your Sway presentation:
- Lesson Title
- Brief Lesson Description (1-2 paragraphs)
- Content Standard (CCSS, TEKS, NGSS, etc.)
- Art Standard (National Art Standards)
Be sure to include the following photographs and/or media in your Sway presentation:
Visual Art:
- PDFs or JPEGs of student art products
- PDFs or JPEGs of students creating the art
- Optional: Visual documentation of the artistic process with photographs of each step
Music, Dance, and Theater:
- Youtube video or audio sample of student’s final presentation/production
- PDF or JPEGs of student practice process
Media:
- Actual artwork samples
- Audio samples
If you are helping to organize a band or choir performance, or a dance or theater performance, have parents use their smartphones to scan a QR code printed on the performance program to open a Sway on their phones. The Sway could also provide additional information about the student’s work and production… and the students themselves could create them!


